Perfect fluffy pockets of fresh pita bread are simple to make and enjoy at home! Great for scooping dips and sauces or stuffing with tasty fillings.
For many years I’ve bemoaned the absence of proper, fresh, fluffy delicious pita bread here in Cambridge (and in the UK in general with a very few exceptions). Those hard oval things you get in supermarkets are as far removed from a proper pita as to be not even worthy of the name, in my opinion.
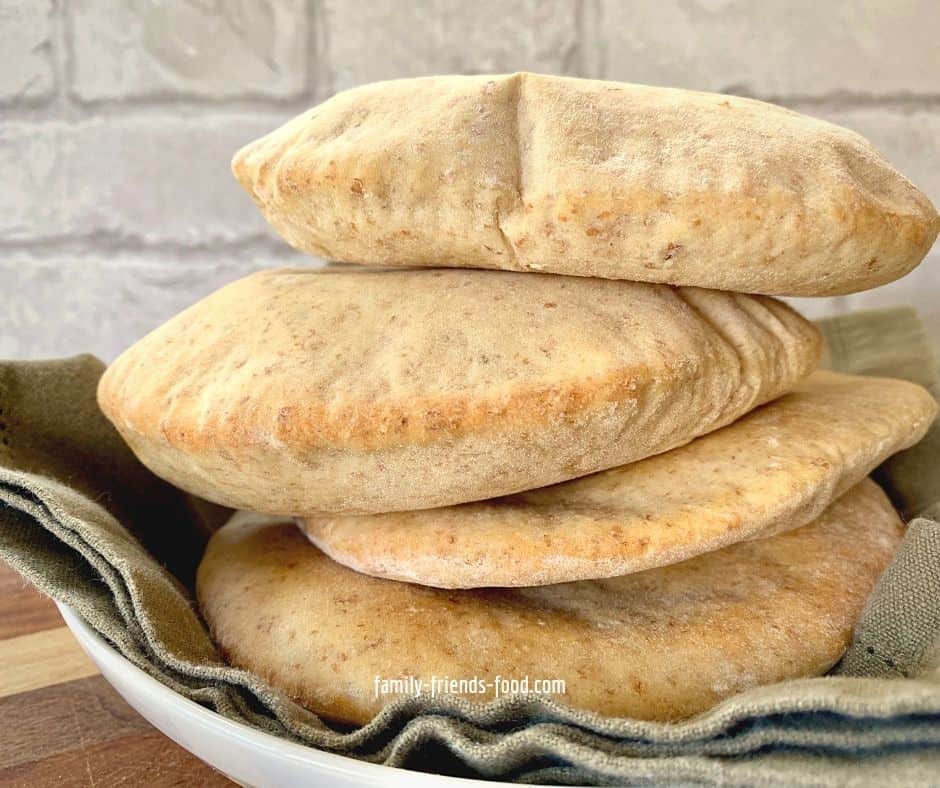
Homemade pita bread recipe
About a year ago, my friend Faraj posted his recipe for homemade pita bread on Facebook. I decided to give it a whirl. O.M.G. Amazing pita! And not even difficult!
I loved them so much that I shared his post to the Family Friends Food facebook page. I know that many of my followers there also tried and enjoyed Faraj’s pita bread. I’m delighted that he’s now given me permission to share his pita bread recipe here.

A bit about Faraj
Faraj is a refugee from Syria. I met him when he came to live with a Jewish family here in Cambridge a few years ago. He became a regular at our shul, helping out by pushing buggies for families with small children, assisting in putting out and clearing up after the kiddush, and generally making himself useful and taking the opportunity to improve his English language skills.
Despite the unimaginably awful journey that he had undergone to finally arrive in Cambridge, Faraj always had a smile on his face and was eager to make friends with everyone. His sunny disposition ensured that everyone was always pleased to see him too!
If you want to know more about how Faraj got to the UK, here is a video from ITV.

A talented chef
Faraj brought his memories of Syrian food with him. He was fortunate that his ‘adoptive’ family here were a) keen foodies, and b) lived close to a Middle Eastern grocers! He was always busy in the kitchen, creating delicious Syrian sweets and savouries, salads and breads.
It was therefore no real surprise that having achieved his GCSEs, Faraj gained a scholarship to a cookery school. Subsequently, he trained at Ottolenghi, then found a job at top London restaurant Honey & Co. Owned and run by an Israeli couple, I’m sure their creative menu of modern Middle Eastern food really utilised Faraj’s talents.
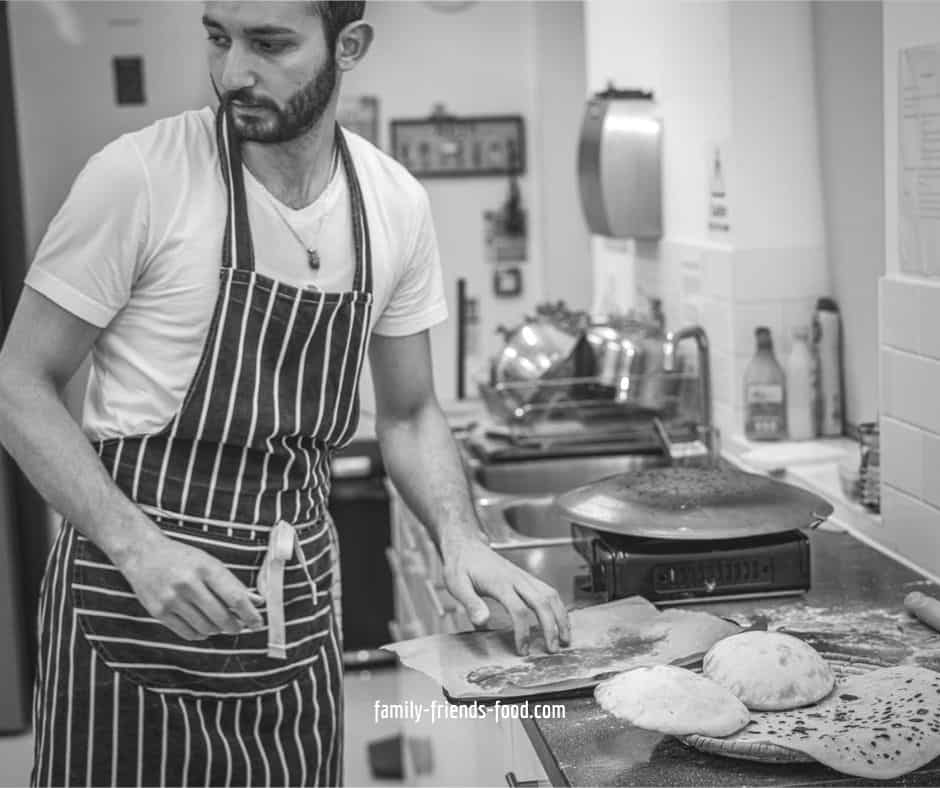
Faraj’s kitchen – a new chapter
When cafes and restaurants across the country closed last year, Faraj returned to Cambridge. He set up a business of his own, offering deliveries of delicious vegetarian and vegan Syrian dishes. They are all cooked in the kitchen of one of Cambridge’s synagogues!
Of course these awesome pita bread were on the menu! They are the perfect thing for scooping up all those flavourful sauces, dips and mezze.

Khubez – pita bread – خبز عربي
This kind of flatbread is eaten across the Middle East. I love what I think of as ‘Israeli’ pita, but of course the same bread is also eaten in Syria, and across the Middle East and parts of Africa. It’s also found in some Mediterranean countries like Greece and Turkey.
It goes by a range of different names, too. Pita bread is also khubez Erabiun in Arabic or lechem Arabi in Hebrew, both meaning ‘Arab bread’. In Turkish is it pida and in Egypt it is known as aish baladi.
Sometimes the name pita is also given to any kind of flatbread, including those which lack the internal pocket. Examples include laffa, also known as ‘Iraqi pita’, or the delicious Druze pita which is cooked over a hot metal dome and served with olive oil and za’atar.
You might also see pita bread referred to as ‘pitta’ with two Ts, ie pitta bread.

Pita bread ingredients
These fabulous Middle Eastern pita bread are surprisingly easy to make. You will need the following basic ingredients:
- strong white bread flour
- wholemeal bread flour – optional, you can just use more white flour instead
- fresh or dried yeast – I always use dried, so easy!
- sugar
- salt
- vegetable oil – I use olive oil but I think any vegetable oil will be fine
- warm water

How to make pita bread
Faraj’s instructions for how to make pita bread at home are quite straightforward and easy to follow. I usually mix and knead dough in my stand mixer, but I followed his instructions to do the process by hand.

First, the flours are placed in a mixing bowl. Then, the yeast, some sugar and water and mixed in a separate bowl and allowed to stand for a few minutes to become frothy.
The yeast mixture is added to the flour, together with oil, salt and water. Then you mix the ingredients to give a shaggy dough.
Finally, you add the rest of the water bit by bit, until your dough is soft but not sticky. The whole process takes only a few minutes. The pita bread dough can then be covered and left to rise for about 45 minutes.

Shaping your dough into pita
Once the dough is mixed, kneaded and proved, it is then divided up and rolled/flattened into pita bread. You can do this with your hands and a rolling pin, on a lightly floured surface to prevent the dough from sticking.
Faraj’s instructions call for dividing the dough into seven small pieces. You could make more slightly smaller pita breads if you prefer. Roll each of the pieces into a ball, then squash it into a flattened circle with your hands. Finally, roll the circle out to about 15-17cm (6-7 inches) across.
Don’t worry if your dough circles aren’t 100% round – your pita will still be delicious!

Baking pita bread at home
Your homemade pita bread don’t need long in the oven. The oven needs to be thoroughly preheated to a high temperature (225°C in a fan oven), with a baking sheet also preheated inside it.
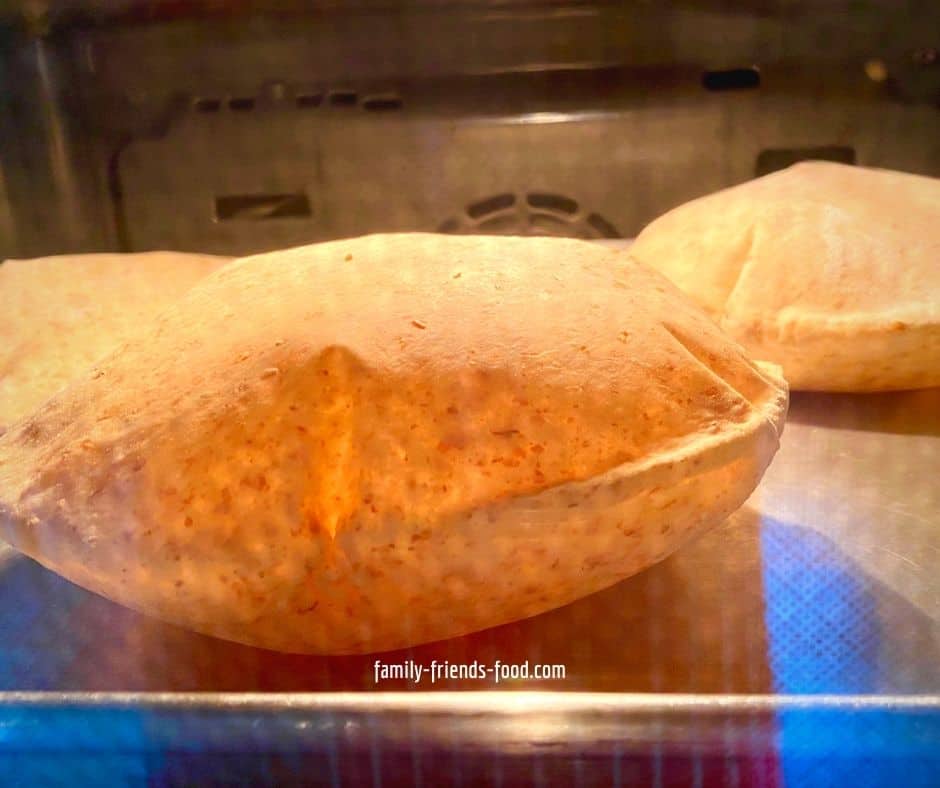
The pita are baked a few at a time so that they have room to bake evenly and puff up. They only take 3-5 minutes in the oven, so even if you have to bake them in a few batches, it doesn’t take long. Wrap your freshly baked pita bread in a clean towel to keep them warm while the last few are baking.
Storing fresh pita bread
Pita bread is best eaten as soon as it is made. Faraj’s recipe makes 7 fluffy pita pockets, so you probably won’t have too many leftovers.
Once at room temperature, they can be stored for up to 24 hours in an airtight bag or box. For longer storage, pita should be carefully packed and frozen.
To ‘refresh’ the pita bread, simply heat in the toaster, or pop back into the oven for a minute or two. If you’re lucky, they might even re-puff!

Delicious fresh pita on demand!
Finally, proper, fresh, fluffy delicious pita bread is available, on demand, whenever I want it! I’m sure that once you’ve tried Faraj’s fabulous recipe, you too will never go back to buying sub-standard supermarket pitot.
And of course, if you’re local, you can even get some baked by Faraj himself! Click here to see an up to date menu from Faraj’s kitchen, and details of how to order.

If you want deliciously easy, family-friendly recipes like this one delivered straight to your inbox, simply click here to subscribe. (Of course, I’ll never pass on your email address to anyone.)
📖 Recipe

Authentic Middle Eastern Pita Bread
Ingredients
- 300 g strong white bread flour
- 100 g wholemeal bread flour (or use another 100g/½ cup white flour)
- 13 g fresh yeast OR 6g dried yeast (approx. 4 teaspoon fresh or 2 teaspoon dried yeast)
- 1 tablespoon sugar
- 1 teaspoon salt
- 2 tablespoon vegetable oil (I use olive oil)
- 215-230 ml lukewarm water
Instructions
- Put the yeast, 1tsp of the sugar and 50ml (approx. ¼ cup) of the lukewarm water in a small bowl and mix until the yeast and sugar dissolve. Set aside for about 5 minutes until the mixture starts to bubble up.
- In a large bowl, mix the flour with the salt and the remaining sugar. Add the oil, yeast and half of your remaining lukewarm water, and mix. It will start to form a shaggy mess at first, but keep mixing. Slowly add more water until the dough comes together as a ball. You need it to be smooth and elastic, and for the dough not to stick to your fingers when pinched. (Do not add all your water in at once. Keep mixing and adding some water until the dough starts to get the shape. It depends on your flour, so you might need less or more water than in the recipe.)
- Leave the dough to prove in a warm place for about 45 minutes to an hour.
- Transfer the dough to lightly floured surface, and cut into 7 pieces, each piece about 95g. Shape them into round balls, cover them in a clean slightly damp towel, and leave them to rest about 7 to 10 minutes.
- After 10 minutes, flatten the balls one at at time, first with your fingers then using a rolling pin to shape into a circle. The circles should be 15-17cm (6-7 inches) across. Use more flour to dust the work surface if it is necessary, just to prevent them from sticking. Then cover them with the damp towel to prevent them from drying out for 5 minutes.
- While the dough is rising, heat your oven to 245°C (225°C fan or 475°F). Heat your tray a little, then place your pita on it and bake for 3 to 5 minutes, or until they puff up and their top is slightly golden.
- This makes seven yummy pitta breads: eat while hot, or keep for a day. To keep your pita fresh, freeze it and warm it up in the toaster or the oven. It will stay in the freezer up to a few months.
Nutrition
More delicious bread recipes
If you love home baked bread, and who doesn’t, why not try…
- Fabulous focaccia – from scratch in only one hour
- Tasty challah rolls – with wholewheat and delicious seeds
- Easy soda bread with yogurt – no yeast required
- Sweet and fruity Hot Magen David buns – delicious warm with butter
I’m linking these tasty pitot up with #CookBlogShare.




Matilda
These look amazing! we love pitta and if I can make my own I am sure they will taste better than shop bought. Can I ask though, we avoid sugar, is it possible to make these with less (or even no) sugar? or does that feed the yeast somehow?
Sorry I am a novice so no real idea!
Helen
Hi Matilda. You’re right, the sugar does ‘feed’ the yeast, and most/all of it will have been ‘eaten’ by the time the bread is ready. Certainly the pita don’t taste sweet!
If you want to reduce the sugar, I would make one batch as written, so you know how they should turn out. Then you can experiment with adding less and see if it affects the finished product.
We also avoid sugar as DH is diabetic, but this small amount (less than 2g per pita) is usually OK.
I hope this helps!
All the best, Helen x.
Cherry
Delicious dough recipe. Next time I will roll a little thinner though (just my personal preference). I made most of the batch plain (which I will freeze) and then for two of them I topped with olive oil, zaatar, crushed garlic and cheese before going into the oven. They were delicious!
Helen
Thanks Cherry, great to hear you enjoyed them. Your zaatar-topped ones sound delicious!
Renee
I have tried this recipe (and several others) and even though the pitas taste great, I can’t get them to puff up. I have followed the recipe faithfully and don’t understand what is going wrong. Any suggestions?
Helen
Hi Renee,
The pitas puff up when steam is formed inside the bread during baking. The oven needs to be REALLY hot, and you should also make sure the baking sheet is preheated before you put the raw pitas on it. If you think your oven isn’t as hot as it says it is, you might try using an oven thermometer to check. I have this problem with my own oven which is often 10-20 degrees cooler than it says on the display. You might find that if you turn the oven up you will get the nice ‘puff’ as the pitas bake. Good luck!
BTW, this is the thermometer I have: link to oven thermometer
Tia
Is this 1 tablespoons of sugar as listed in the ingredient section or 1 teaspoon as written in the recipe? Thank you. Exited to make this.
Helen
Hi Tia, one teaspoon is added to the yeast mixture to activate the yeast, and the remainder of the tablespoon is added later in the recipe. I hope you enjoy the pita! All the best, Helen.
Divina
Is there a way to make 2 sides even? I always get one side thick and another side thin.
Helen
Hi Divina, I’m not sure it’s possible! Mine always come out slightly uneven too, and I think it’s just the way the dough behaves when the air pocket forms. Sorry 🙁
Sara
On my second time making this recipe, a double batch this time. Great, straightforward instructions and a brilliant result. Pita puffed up beautifully in the oven and absolutely delicious! Am going to stock up the freezer for lunchtimes.
Helen
That’s great to hear Sara! Stocking the freezer sounds a great idea – they warm up quickly in the toaster when you need them.
Carrie
Just made these, perfect ! Mine did take a bit longer to get golden brown – probably my oven.
Helen
Thanks Carrie – glad you enjoyed them!
Anjali
I’ve never actually made pita bread at home – I usually buy it from my favorite mediterranean bakery! But your version looks like bakery quality – cannot wait to try it soon!
Helen
Once you eat it fresh from your own oven there’s no going back!
Jessica Formicola
Oh I LOVE pita bread, but I’ve never tried making it myself! This looks great and I can’t wait to try it!
Helen
Thanks Jessica. We’re big pita fans too!
Jenn
I love freshly baked bread but have never tried pita. Your recipe makes it seem so easy – this will be my weekend baking project!
Helen
I’m sure you’ll love them Jenn. Especially that magic moment when they puff up in the oven.
Beth
These are so puffy tender and delicious! I will definitely be making them often!
Helen
Thanks Beth! So happy you enjoyed them.
Beth Sachs
We love pita bread but I have to confess to buying them. Will be giving your easy recipe a go at the weekend!
Helen
Yay! You’ll see Beth, there’s no going back – these are SO much better than shop bought ones.